Before finding the answer to the following question, “Why Is My Soldering Iron Not Heating Up” it’s important to understand How Hot a Soldering Iron Should Be. Generally, soldering should occur between 316 and 371 degrees Celsius or 600 to 700 degrees Fahrenheit. The type of solder you’re using determines the specific temperature target.
Ideally, your soldering iron should reach temperatures above the melting point of solder (600 to 650 degrees Fahrenheit or 316 to 350 degrees Celsius) to be able to melt lead-based solder. If you are using lead-free solder, you should be looking for slightly higher temperatures, i.e., 650 to 700 degrees Fahrenheit or 343 to 371 degrees Celsius.
How Do I Know My Soldering Iron Isn’t Hot Enough?
If your soldering iron doesn’t melt your solder on contact, it isn’t hot enough. It’s worth mentioning that a soldering iron can get hot enough to burn your finger or working surface, so please be careful. You do not want to test how hot your iron is with your fingers! However, it must reach and surpass the solder’s melting point for it to be deemed hot enough.
You can do a quick test by powering your soldering iron on for a few minutes before initiating contact between the soldering iron tip and your solder. If the solder melts on contact, your soldering iron is hot enough. If that isn’t the case, you have a problem and we hope that we can help you solve it with our troubleshooting tips below.
There are many reasons why a soldering iron would fail to heat up or reach the desired temperature for soldering. Here are the top reasons and troubleshooting tips.
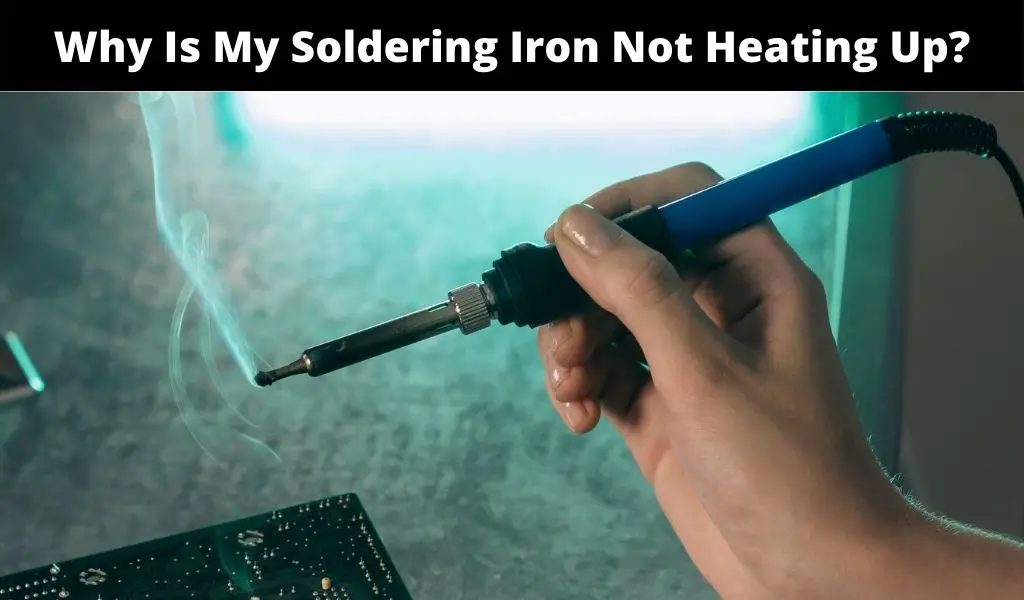
Why Is My Soldering Iron Not Heating Up? (6 Troubleshooting Tips)
There are many reasons why a soldering iron would fail to heat up or reach the desired temperature for soldering. Here are the top reasons and troubleshooting tips.
1. Soldering Iron Tip Oxidation
This is arguably the most common reason why your solder may not be heating up to the desired temperature. The soldering iron tip must be clear of any debris to allow perfect heat transfer. This calls for proper maintenance every time you use your soldering iron. If the tip is oxidized from the soldering iron not being cleaned and stored properly, it will not transfer the heat from the tip to the solder.
Oxidation is easy to identify. If your soldering tip has turned black and seems to have deposits, it is probably oxidized. This is caused by iron oxide deposits on the tip, which happen naturally when the tip is exposed to oxygen in the air.
Fixing the problem: You must get rid of the oxidation to solve this problem. To remove oxidation from the tip of your soldering iron, you can use a tip cleaner or a damp sponge. Tip cleaners are made of brass or other abrasive materials and can be used to gently scrub away the oxidation. Damp sponges can be used to wipe away any residue.
It’s important to clean the tip of your soldering iron regularly to prevent oxidation build-up. You should also make sure to tin the tip of your soldering iron after cleaning it. Tinning involves coating the tip of the soldering iron with a thin layer of solder, which can help protect it from further oxidation.
In unique cases, it might not be possible to remove the oxidation. If that’s the case, you should replace the soldering iron tip with another one that’s compatible with your soldering iron.
2. Broken Heating Element
If you have ruled out oxidation, your heating element could also be the cause of your problem. Soldering irons have a heating element that transforms electric energy to heat energy. Over time, the heating element can become damaged due to wear and tear, overheating, or exposure to moisture. If the element is broken, it won’t heat up at all or reach desired temperatures.
Make sure that your soldering iron is properly plugged in and that the outlet is working. Check that the power switch on your soldering iron is on.
If the power checks out, then the source of your problem is the heating element. You can check if the heating element is working by using a multimeter to measure the resistance of the element. If the resistance is infinite or significantly higher than expected, this could indicate that the heating element is damaged.
Replacing a heating element can be a complex process, and it may be best to take your soldering iron to a professional for repair or replacement. In some cases, it may be more cost-effective to simply replace the soldering iron if the heating element is damaged or worn out.
3. Soldering Iron is Disconnected from the Power Outlet
A soldering iron that isn’t connected to the power source won’t heat up. While this may appear obvious to many, some people face this issue, especially when the power cord is short, and there is a lot of movement. You can disconnect your soldering iron by mistake. If it’s plugged in, then make sure that the outlet is working. As a quick test, you can plug in a lamp or another device where you can visually see it being powered.
If the outlet is working and you have the soldering iron plugged in, check that the power switch is on or that the temperature dial is set correctly. This could be overlooked if you’re sharing a soldering iron with someone and they have a habit of turning the dial down to cool it.
4. Soldering Iron Needs More Time to Heat Up
Another issue is that you are not simply waiting long enough for the iron to heat up. Different soldering irons will require different times. While most soldering irons will take a few minutes to reach the desired temperature, some may take longer due to many factors ranging from their size to power needs, or like we mentioned earlier, oxidation.
When dealing with a soldering iron that has a unique start-up time, you’ll be forced to wait longer. Patience is important when troubleshooting this problem. It’s not practical to want your iron to heat up in a few seconds. Check the manufacturer’s instructions to know precisely how much time it takes. If you wait for the specified time and your soldering iron isn’t heating up, you can consider other problems like oxidation, a broken heating element, disconnection, etc.
If your soldering iron doesn’t specify the timing, you can record the time it takes typically. If you’ve been using the soldering iron in the past with no problems, you’ll know if it’s taking longer than before to heat up. When patience isn’t working, you can seek professional help. However, make sure you consider all the above troubleshooting tips.
5. You’re Using the Wrong Solder
The solder you’re using could also be the source of your trouble. As mentioned above, there are different types of solder. The soldering process also varies i.e., hard soldering, soft soldering, and brazing. Different soldering types have their own applications.
Every soldering process has unique temperature requirements. For instance, soft soldering is done at 90 to 450 degrees Celsius or 190 to 842 degrees Fahrenheit. The process requires solder containing tin and lead. If different soldering is used, it may not melt.
Hard soldering requires a hotter temperature i.e., 450 degrees Celsius or 842 degrees Fahrenheit. The ideal solder in this process is made largely of brass or silver. A typical soldering iron may fail to reach the required temperatures. In fact, hard soldering usually requires blowtorches capable of reaching over 450 degrees Celsius.
Brazing also demands temperatures that match the hard soldering process i.e., 450 degrees Celsius. So, if a soft soldering process is done with solder required for brazing or hard soldering, the solder may not melt.
The thickness of your solder could also be to blame. If it’s thicker, it will take longer to melt. This problem is evident when the solder you’re using is visibly thick but not melting, yet your soldering iron appears to be hot and working properly. The required melting time increases as the thickness of the solder increases.
You should buy the right solder for your application. Knowing if you will do hard soldering, soft soldering, or brazing is a great place to start. It also helps to purchase solder that is thinner in diameter as such solder melts faster.
6. You’re Using Low-Quality Solder and Soldering Iron
Subpar solder could also be to blame. Like everything else, solder varies in quality. Cheaper options packed with impurities can be harder to melt which could also result in bad or weak joints. While cost is sometimes an issue, you shouldn’t compromise on solder quality.
Using a cheap soldering iron could also cause heating issues. While expensive solder and soldering irons aren’t necessarily the best, you usually get what you pay for in terms of quality. Ideally, try getting solder and a soldering iron that is reasonably priced. Check out our blog post on some of the best soldering stations under $100!
Conclusion
There are several possible reasons as to why your soldering iron may not be heating up, and we hope you were able to find the issue after reading about some of the things to troubleshoot. If you weren’t able to fix your issue, it may be time to get it repaired or get it replaced!