Desoldering wick, also commonly known as solder wick, desoldering braid, or solder wire, consists of copper wires which have been braided together. You can find it at any typical hardware store, and it usually comes in a coil.
Desoldering wick is used to remove solder from printed circuit boards, solder joints, or other electrical components. Using desoldering wick is a simple way to correct any soldering mistakes and soak up excess solder.
Why Should You Learn to Use Desoldering Wick?
If you are learning to solder, it is a good idea for you to have some desoldering wick on hand and for you to learn how to use it. Learning to use desoldering wick is a valuable skill which will allow you to repair any soldering mistakes you may make as you learn to perfect your soldering technique!
How It Works?
The basic concept of a desoldering wick is as follows. Copper is a good heat conductor. So solder, which is attracted to heat, will be drawn into a desoldering wick as it gets heated up by the soldering iron. Once contact is made between the hot desoldering wick and some excess solder, the excess solder will be wicked away into the copper braided wire.
How to Use a Desoldering Wick ( Step by Step Instructions )
Step 1: Preparation and Safety
Use an exhaust fan to ensure that you will not inhale any fumes that may be released by the soldering process. Set up the fan so that it draws the fumes away from you. Alternatively, you can wear a safety mask to avoid inhaling the fumes, but an exhaust fan is the best option.
Please do not forget to wear a pair of safety goggles in order to safeguard your eyes from debris and molten solder.
Step 2: Heat up the Soldering Iron by Plugging It in
Plug the soldering iron into a wall outlet and place it securely in its holder or another safe location to ensure that it can heat up safely and that it does not fall or get damaged.
Wait for the soldering iron to heat up to a proper working temperature. It usually takes somewhere between three and five minutes for the average soldering iron to reach its optimum soldering temperature.
Step 3: Add Flux If Necessary
Most kinds of desoldering wick come with flux. If your desoldering wick comes with flux, this step is not necessary. But if you have chosen desoldering wick which does not come with flux (unfluxed), you will need to add your own flux to the desoldering wick before desoldering. Desoldering wick that does not have flux will not remove any solder.
Flux can be purchased in a liquid form so that it does not require heat in order to apply it to the desoldering wick.
Simply apply a bit of flux to the tip of the desoldering wick before using it to remove the excess solder.
Step 4: Position the Desoldering Wick
Unwind a length of desoldering wick from the coil (at least 2 inches). Hold the desoldering wick on top of the solder which needs to be removed or the component you wish to rework.
Helpful Tip 1: Try using a pair of needle nose pliers in order to place the desoldering wick in position and to hold it down while desoldering to avoid burning your fingers.
Helpful Tip 2: Try to match the width of the desoldering wick to the solder joint or the contact area.
Helpful Tip 3: It is also best to use a soldering iron tip that matches the width of the desoldering wick. This will prevent the desoldering of unwanted areas and ensure that you do not require too much dwell time or to melt the solder over and over again.
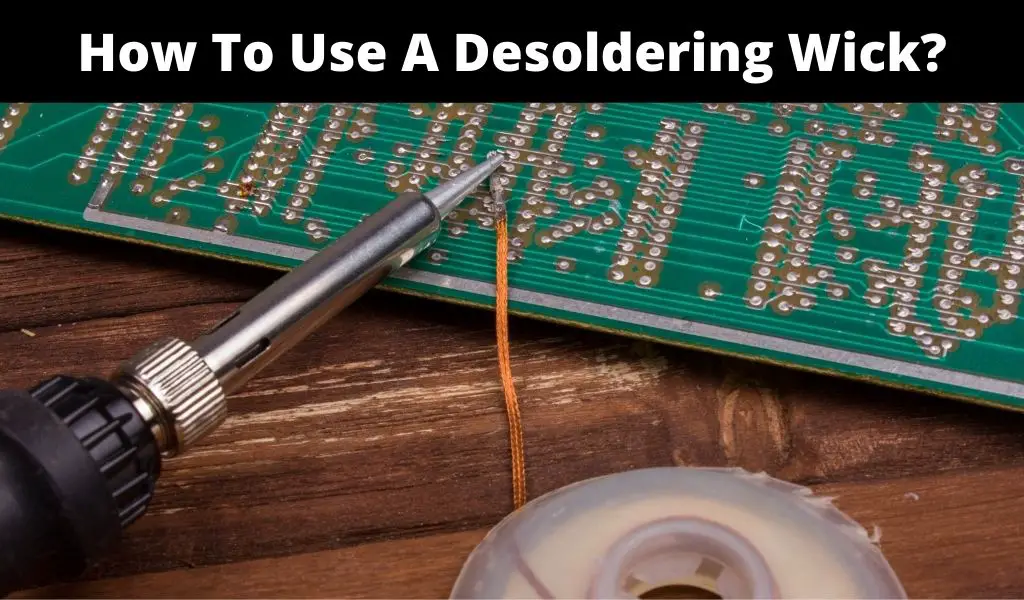
Step 5: Apply Heat with the Soldering Iron
Apply the tip of the already heated soldering iron to the desoldering wick which has been placed on top of the solder to be removed. As the soldering iron stays in contact with the braid and the solder, the solder will melt and be wicked up into the desoldering braid through capillary action. As the solder is wicked up by the braid, it will cool and fuse to the desoldering wick. In this way, all of the solder from the joint will be removed.
Step 6: Remove the Soldering Iron and Desoldering Wick
Once the excess solder has been completely soaked up by the desoldering wick, remove the hot soldering iron and the desoldering wick from the component or printed circuit board at the same time. Do not touch the desoldering wick itself, because it will be very hot. Simply remove the coil.
It is crucial to remove them both at the same time. Do not remove the soldering iron first. This is a beginner’s mistake. If you lift up the soldering iron first, the desoldering wick may cool off and fuse to the board, potentially causing damage to your circuit board or the components when you try to remove it.
Step 7: Remove the Electrical Component
Now that the solder has been removed, if you are trying to repair or rework a particular electrical component, you can now remove the component from the printed circuit board and rework that component as you see fit.
Step 8: Cut off the Used Desoldering Wick
Use a pair of wire cutters to cut off the used portion of the desoldering wick that has fused with the excess solder. It is important to cut off all the used desoldering wick, since it cannot be reused. You will need to start with a clean segment of desoldering wick each time.
Step 9: Repeat the Above Steps If Necessary
If all the excess solder has not yet been completely removed or if a component has a large amount of solder on it, you will need to repeat Steps 1 through 6 for as many times as is necessary until all the excess solder is completely wicked away.
Step 10: Clean Up
You can now unplug the hot soldering iron in order to turn it off. Make sure to keep it securely in its holder so that it can cool off safely. Do not touch the soldering iron tip unless you are sure that it has cooled off completely.
Be sure to discard the used segment or segments of desoldering wick that have been cut off from the coil.
Clean up your work station so that you can be ready to solder the next time.
Other Helpful Hints and Tricks
Tip 1: Add More Solder to Areas Where Solder Is Hard to Remove
If you are having trouble removing a tiny amount of solder from a joint (from inside a pin hole or tight crevice, for example), you can try adding more solder to the area before attempting to remove the solder. Though it may sound rather counterintuitive, adding the extra solder will create a larger solder joint which will be easier for the desoldering wick to pick up and absorb.
Tip 2: Maintain Your Soldering Iron Tip
In order to solder efficiently, it is good to make sure that your soldering iron tip has been properly cleaned from time to time. If your soldering iron tip is covered with oxidation and excess burnt flux, it will not conduct heat properly and your soldering attempts will be far less effective. Clean a dirty tip by using “tip tinner” (another name for tip cleaner).
Tin your soldering iron tip by adding fresh solder to the tip. This will prevent the tip from oxidizing.
Tip 3: Do Not Apply High Heat for Longer Than Is Necessary
The longer you apply high heat to your circuit board or electrical components, the higher chance they have for becoming damaged. Apply heat for soldering and desoldering only as long as is necessary.