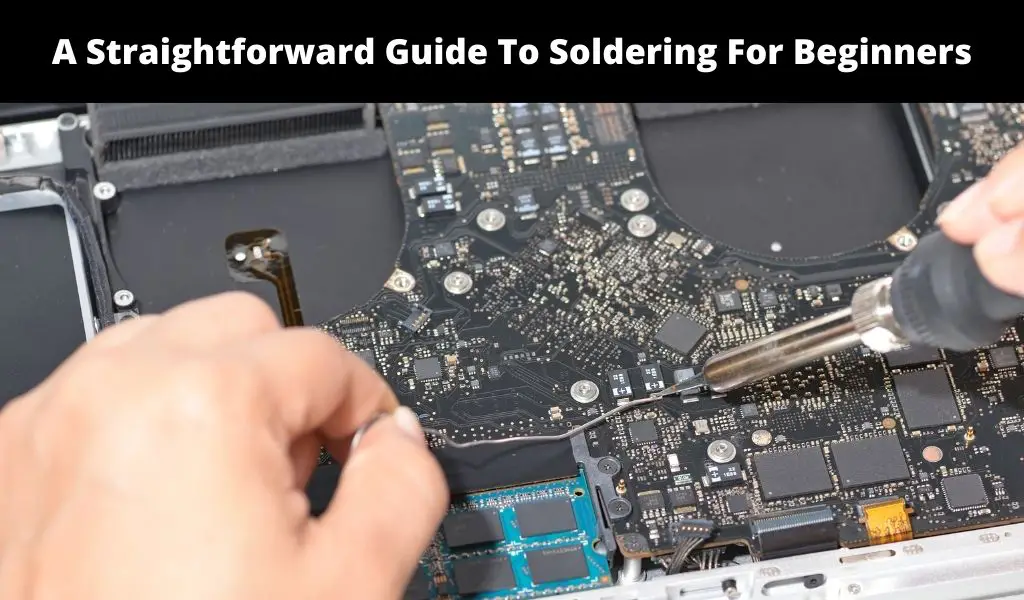
When soldering, you need a soldering iron which is simply a heated metal with a tip and insulated handle. Soldering iron supplies the heat needed to melt the solder.
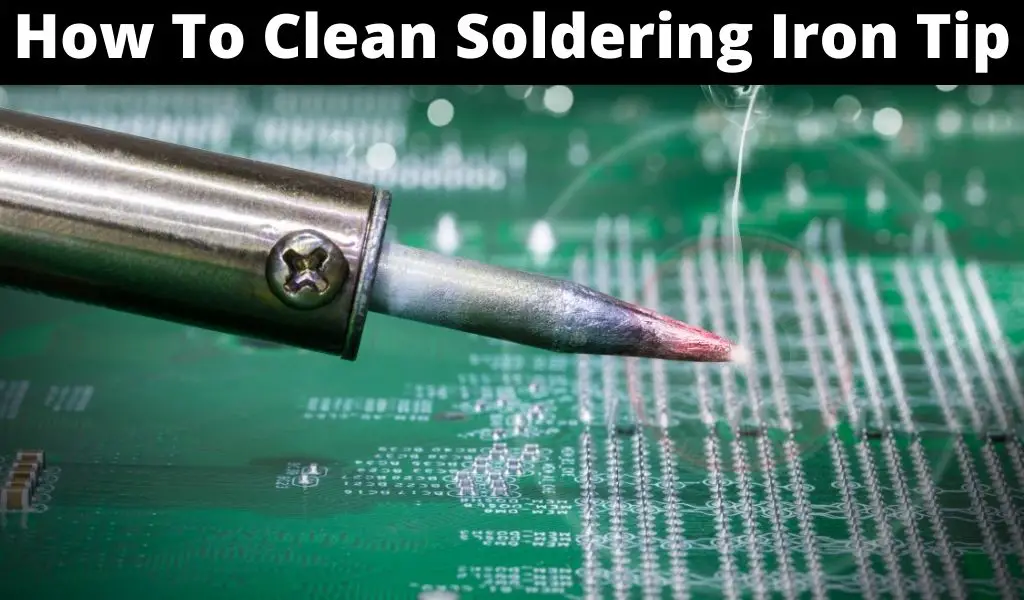
Soldering iron must become hot enough to melt solder. This process usually makes the tip oxidize quickly. The tip is also prone to dirt and contamination that accumulates during soldering or when the soldering iron is sitting on a soldering iron holder or in storage.
Oxidation is bad for soldering iron tips as it insulates the tip, decreasing heat transfer. Besides oxidation, the accumulation of burnt flux residue also causes heat transfer problems. Contaminants on the tip also make it hard for the solder to stick to the soldering iron tip.
Generally, heat transfer passes through molten solder situated between the soldering iron tip and the components being joined. As a result, a tip that is repelling solder won’t be effective. If the oxides, flux residue, and other contaminants remain on the soldering iron tip for a prolonged time, they harden and become extremely difficult to remove.
It’s therefore clear why it is important to clean a soldering iron tip after every use. What’s more, you will prolong the lifespan of your soldering iron and avoid unnecessary costs. Cleaning also avoids rust and corrosion as soldering iron tips are constantly in contact with hot metals.
Below is a detailed guide on how to clean soldering iron tips. Let’s first discuss the tools you need to get the job done perfectly.
What Tools Do You Need to Clean a Soldering Iron Tip?
To clean your soldering iron tip effectively, you’ll need the following:
A yellow sponge: You need a porous sponge that is capable of holding water. The sponge is useful for cleaning since it allows contraction of the soldering iron at different rates, which in turn aids in knocking off stuck solder and other contaminants that tend to cling to the soldering tip. The yellow sponge should be damp as opposed to being soaked in water.
Sandpaper: You’ll also need sandpaper to get rid of stubborn contaminants, oxides, or residue on the tip. Since sandpaper can ignite at high temperatures, use sandpaper when the soldering iron is cool. The sandpaper should also be used on the tip only. Alternatively, you can remove contaminants with a soft wire brush or steel wool.
Soldering iron tip cleaner: This item may not be necessary unless you have some spare cash to spend. Some extra solder can get the job done. However, if you have a high-tech soldering iron, soldering iron tip cleaner is good for intensive cleaning purposes.
How To Clean Soldering Iron Tip ( Step By Step Guide )
Step 1: Disconnect Your Soldering Iron
Start by disconnecting your soldering iron and letting it cool down. This may take approximately 15 to 20 minutes. This step is important for avoiding burns and other hazards like an electrical shock.
Step 2: Clean the Soldering Iron
If your soldering iron or the tip has contaminants like grease or dirt, wipe such contaminants using a clean cloth. If there is corrosion, you can remove it using a cloth soaked in alcohol.
Step 3: Damp Your Sponge
Ideally, cleaning should be immediate to ensure oxides and other substances that stick on the tip don’t do so completely. Cleaning after every use is critical for stopping the accumulation of solder, flux, and other residues.
Start cleaning by damping your sponge and wiping the tip. Use water only. When cleaning, rub the tip of your soldering rod gently with the sponge to eliminate the mild and soft build-up of materials. It’s worth noting that a damp sponge won’t clean your iron tip effectively. For this reason, proceed to the next step below.
Step 4: Scrub the Tip Using Sandpaper, Steel Wool or Wire Brush
Using a wire brush, sandpaper, or steel wool, remove any stubborn rust stains, hard residue, and other substances that may have hardened over time. You may need to use some substantial effort to clean the tip perfectly. Dampening the tip with your sponge will help to scrub the tip clean. Your tip should be smooth and clean when you finish this step.
Ideally, you shouldn’t use abrasives to file a soldering iron tip clean. Soldering iron tips tend to be made of copper featuring a protective iron plate. If you pierce this plate, the tip’s lifespan will be reduced significantly. Copper is an excellent conductor. However, when exposed to solder, the copper will dissolve.
In some cases, some slight scrubbing may not remove oxides. In such cases, you can use a tip cleaner which is usually a mixture of flux and solder paste strong enough to get rid of oxides. When using the cleaner, simply thrust the tip into the cleaner several times to get an even coat. You may be required to gently wipe the tip with a cloth to salvage a bad tip that was excessively coated. A soft steel brush can also get the job done.
However, cover the tip immediately (with solder) to avoid oxidation.
Important: Use a softer, less abrasive material to clean the tips. While steel wool and a wire brush may work, softer less-abrasive materials will work better. Metal wool can remove dirt and many other contaminants that can’t be removed using a damp sponge.
You may need to increase pressure when cleaning the tip. Other techniques like varying the stokes will also help to remove stubborn contaminants from the edges and sides.
What’s more, frequently wiping the tip on a damp sponge isn’t recommendable as it causes constant temperature fluctuations, resulting in metal fatigue and increasing chances of iron tip failure.
Tinning
There are maintenance tips to consider if you have a soldering iron. One such tip is tinning. The process involves spreading solder over your soldering iron tip. The tip is covered with iron plating. When the plating is oxidized, destructive processes like corrosion take place, exposing the metal to oxygen.
To avoid this, the tip of the soldering iron is coated using a layer of solder. The thin layer is applied to a clean soldering iron tip before powering off the iron. The process prevents oxidation and corrosion when the soldering iron is in storage.
Guide to Tinning a Soldering Iron Tip
To start tinning, start with cleaning the soldering iron to remove oxides and other dirt. Proceed by heating your soldering iron to 500 to 600 degrees Fahrenheit. When the solder is at ideal working temperatures, take the solder and make contact with the soldering iron tip. Ideally, you should use the best solder to ensure your iron tip is preserved accordingly. Solder with flux is recommendable. Finish by allowing the layer of solder to cool down on the tip.
Tinning is necessary for soldering iron tips that aren’t pre-tinned. Also, you may not be required to tin a new soldering iron or a properly maintained tip. After tinning, the soldering iron tip should be cared for accordingly to avoid tip de-wetting. Occasional cleaning and adding fresh solder will ensure the tip is protected, especially during long periods of idling or inactivity.
When tinning un-platted copper, cleaning should be followed by filling, after which the tip is heated, and a rosin core solder fed when the soldering iron attains the lowest temperature needed for melting solder. Excessive heating can cause the tip to oxidize and fail to accept the solder.
Plated tips shouldn’t be heavily abraded or filed. They should also be treated with care to avoid damage or shortening their work lives. A mild abrasive cloth or some acid flux can be used for removing oxides just before tinning or re-tinning the soldering iron tip.
Cleaning Soldering Iron Tip Based on Scenario
The technique for cleaning a soldering iron tip may vary depending on the scenario in play. For instance, how do you clean your soldering iron tip if you have a cold and dirty soldering iron? Well, this scenario is common in workplaces like electronic labs where soldering happens often. If the soldering tip has gunk, it won’t heat properly even when heated for a prolonged time.
To clean such a tip, lightly scuff the tip’s surface using 600 grit sandpaper (or higher) to remove the gunk. Scuff until you have some luster again. However, ensure you don’t remove the metal as this will result in oxidation.
When faced with a dirty soldering iron that is hot, take a damp sponge and flick the tip of your soldering iron. Ensure the sponge is placed somewhere to avoid burns. This should remove brown deposits (rosin) on your soldering iron tip. If not, you can repeat the cleaning step discussed above.
FAQs About Soldering Iron Tips Cleaning and Related Information
How do you ensure your soldering iron tip is clean and well maintained?
You must incorporate simple maintenance procedures to keep your soldering iron tip clean at all times. These procedures range from using the soldering iron at the ideal temperatures to ensuring you wipe excess debris after use.
Generally, you should operate your soldering iron at approximately 427 degrees Celsius (800 degrees Fahrenheit) or below. Operating at higher temperatures causes the formation of oxides resulting in detinning.
When wiping your soldering iron tin, use sulfur-free 100% cellulose sponges only or brass wool. Tinning is also important to preserve your tip. In case of detinning (tip gets oxidized), restore in several ways.
For instance, you can use a tip cleaner that is free of halide for providing fast and safe re-tinning. The cleaner is also ideal for eliminating oxidation. Simply wipe your oxidized tip at a typical soldering temperature for several seconds until the entire tip is covered.
You can also use a polishing bar. Polyurethane foam bars with an abrasive can polish the tip and get rid of oxides effectively, after which the tip is re-tinned immediately using rosin core solder.
What causes detinning?
If you tin with solder containing little tin, detinning will be the result. The same applies to failing to cover the tip during idling periods. Operating the soldering iron at very high temperatures will also cause detinning by speeding up oxidation. Other instances that cause detinning include using small solder wire with very little flux to keep the soldering iron tip tinned.
Using low-residue flux, no-clean fluxes, or failing to use flux at all during soldering will also cause detinning.
How often should you clean your soldering iron tip?
Cleaning should be done every time you use the soldering iron. However, don’t overclean the tip. Flux can cause black residue on your soldering iron tip. However, it is advisable to leave the residue behind as opposed to scrapping it off every time. If your soldering iron tip is still dirty after being cleaned, examine for cracks or holes on the iron plating.
Soldering tips have copper inside them. Check for copper coloring when inspecting the tip for holes or cracks. A damaged tip should be replaced.
Why should I clean my soldering iron tip?
Cleaning and maintenance like tinning are important for several reasons. Besides ensuring your soldering iron works perfectly at all times, cleaning also ensures you save money you would have otherwise wasted buying a new soldering iron. A clean and well-maintained soldering iron also solders well and forms strong joints free of impurities.
How should I store my soldering iron tip?
Besides cleaning, how you store your iron tips will determine how they perform and last. Luckily, there are several simple procedures you can consider to ensure you store your soldering tips perfectly.
For instance, when storing your soldering iron for short periods i.e., between soldering sessions, store the iron in an iron holder. The iron should also be unplugged from the power outlet, otherwise, the lifespan of the tip will be decreased significantly. Ideally, storage should be at the lowest temperature when the soldering iron is idle.
When storing for long periods i.e., a day or more, you must follow the cleaning steps discussed above. Also, tinning is an important soldering iron maintenance step as it prevents oxidation. Soldering iron tips should also be kept in sealed containers such as cases or bags that avoid oxidation, contamination, and exposure to elements like moisture that will cause rusting.
Lastly, remember to loosen the screw/nut that holds the tip in place before storage. Doing this ensures the tip doesn’t get “seized” or stuck.
How do I reactivate a soldering iron tip?
If you clean your tip and store it properly, but it still gets oxidized, there are steps you can follow to reactivate the tip. Oxidized tips look dark. They are also difficult to tin. To fix the problem, you must reactivate the tip.
To do this, use an activator substance. Dip your tip into the substance and move it around until it gains its shine. The fine additives and abrasives should break down. This process should also eliminate the oxide layer.
Once the tip is shiny, remove it and clean it using steel wool or a soft wire brush before re-tinning. Re-tin immediately to avoid oxidation. You can flush the tip using solder to remove any contaminants before cleaning and re-tinning again. The tip should be usable at this point. You should use high-quality soldering iron tip reactivators to get the best result and also adhere to RoHS guidelines. Reactivation keeps soldering iron tips in great condition. It also makes soldering easy and improves the resulting soldering joints.
How does temperature affect soldering iron tips?
As mentioned earlier, soldering iron tips should be subjected to an optimal and consistent temperature. Overheating your soldering iron for prolonged periods will decrease the lifespan of the tip. Considering temperature fluctuations are inevitable when soldering, you should never heat the soldering iron more than required. Besides damaging the tip, overheating can compromise the results.
If you have a high-tech or advanced soldering iron with a temperature sensor, regulating temperature shouldn’t be a problem. Such soldering irons can sense temperature fluctuations and restore optimal temperature automatically within the required range.
Some soldering irons feature better temperature regulators than others. The time taken to reach desired temperatures will differ depending on the model. Remember, the temperature you choose will determine the lifespan of your soldering iron. Avoid high-temperature settings as much as possible.
Ensure you return the setting to idle or turn off the soldering iron completely when you aren’t soldering for an extended period. Unless your iron can automatically decrease the temperature when idle, do so manually. The ideal temperature should be 427 degrees Celsius (800 degrees Fahrenheit) or below.
How do you care for your solder iron tip?
While cleaning, tinning, and ensuring your solder operates at optimal temperatures will help prolong the tip’s lifespan, you should invest in a high-quality soldering iron from the onset.
Buying the best soldering iron you can find will ensure it lasts for years with the right cleaning and maintenance. You should also use high-quality solder. Substandard solder is packed with impurities that stick and build upon the tip creating many problems. To avoid build-ups that compromise heat transfer and the quality of soldering joints, buy high-quality solder only.
It helps to stick to reputable brands only. You can also conduct your own tests before using solder. For instance, heat the solder and observe how it melts. High-quality solder melts readily at an expected temperature. On the other hand, low-quality solder won’t melt completely.
You can also assess quality by considering the appearance. Solder containing lead which has a shiny appearance. Low-quality solder is more matte in color when molten. The type of solder in use will also dictate its qualities. It is important to choose the ideal type of solder given your application and use the right quantity. Using solder excessively can increase the chances of residue building up on the tip.
In a nutshell, cleaning and tinning is a small part of proper soldering iron tip maintenance. The working temperature, quality of solder, type of solder, and many other factors determine how long your soldering tip will last.
What is flux, and what role does it play in soldering iron tip cleaning and maintenance?
Flux can be defined as a substance responsible for removing the oxidation layer that forms when metals are exposed to air. The layer prevents solder from wetting the joint effectively, resulting in poor-quality joints.
Flux deals with metal oxidation by dissolving the resulting layer that evaporates when the flux is heated to boiling point. Flux is sold as a paste or forms part of the core of soldering wire. In such instances, it works perfectly when soldering.
Dipping your soldering tip inside flux when cleaning will reduce the tip’s lifespan. Flux is corrosive. Some types (water-soluble types) can also
damage soldering iron tips at high temperatures. If you must use flux in your applications i.e., when wave soldering, remove it immediately from your tip. A full soldering iron tip cleaning process is recommendable to avoid premature tip failure.
Alternatively, you should use no-clean flux that has been specifically designed for use without cleaning. The flux is mild. However, it may not be as effective for removing oxidation from a soldering iron tip.
What does a clean soldering iron tip look like?
You will know your soldering iron tip is clean if it is shiny, bright, smooth, and free of any contaminants.
Conclusion
The above information highlights all there is to know about cleaning and maintaining soldering iron tips. The cleaning can be done with ease but may depend on the scenario. Tinning is also an important part of cleaning and maintenance as it protects the bit from oxidation.
Many other factors also dictate cleaning. For instance, the quality of the solder will determine the need and frequency of cleaning. The operation temperature also matters. Soldering irons shouldn’t be heated excessively. To avoid oxidation and moisture damage, the tips should also be stored appropriately (preferably in sealed cases). In ideal cases, cleaning should be done before use, during use, and after usage.